
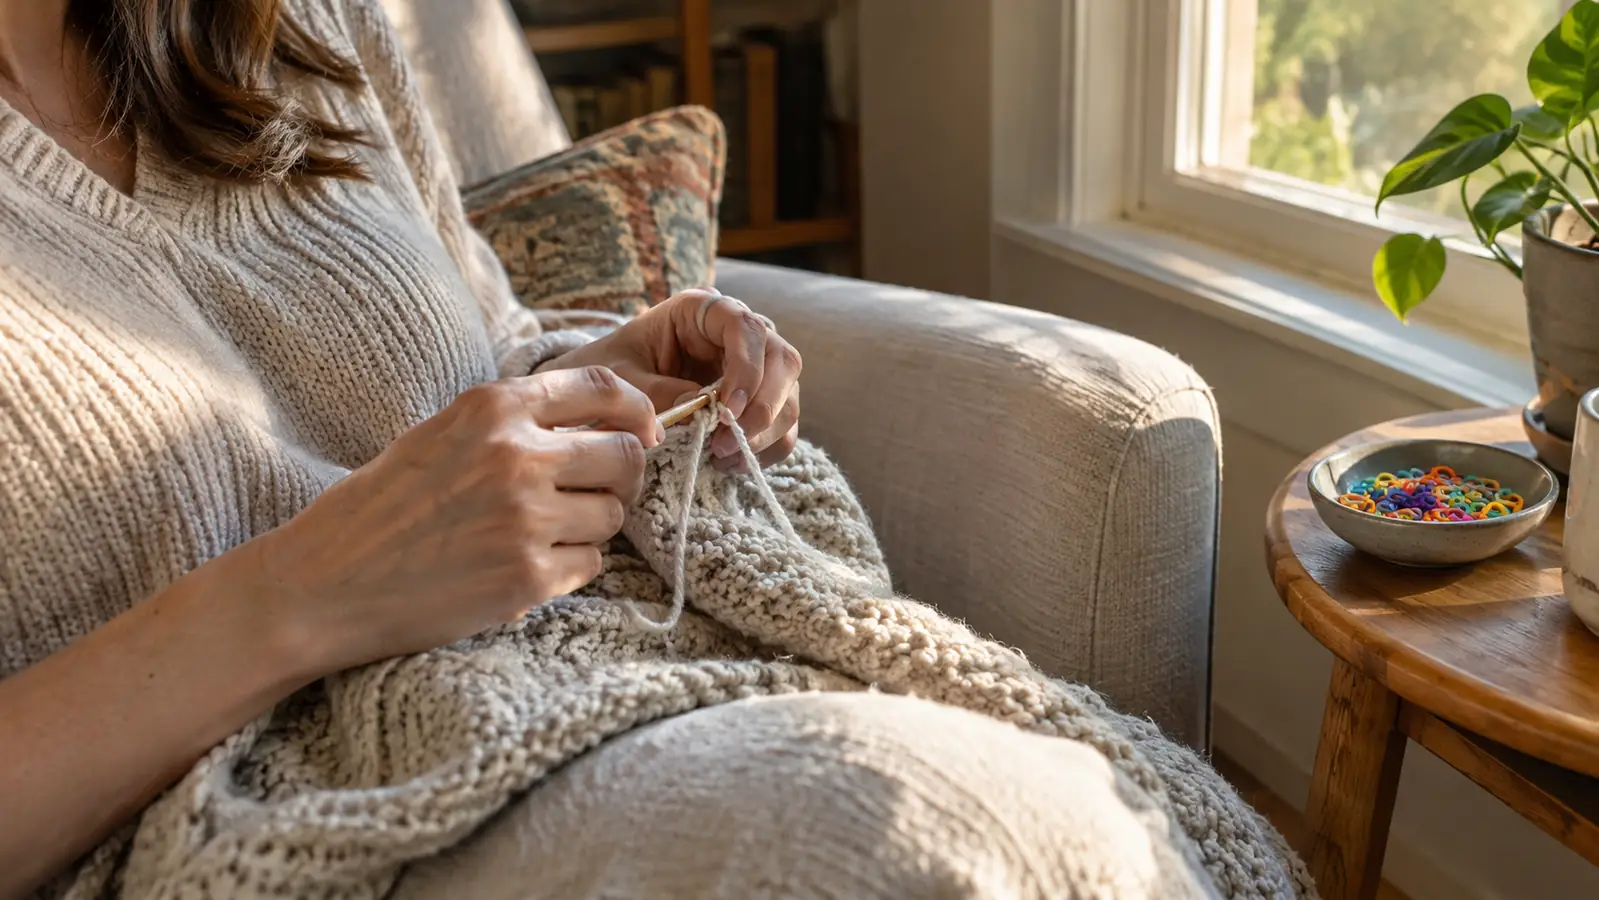
You crochet along, the blanket grows, and somewhere around row twelve you realize you have no idea whether you are on stitch forty or stitch sixty. So you pull the row out and start again. I did that for years, usually on a Tuesday night when I was too tired to count and too stubborn to stop. Then I started using HiMo locking stitch markers the way my grandmother used safety pins, and I stopped guessing.
Counting stitches is not about being good at math. It is about putting a physical mark where your eyes can find it, so your hands never have to stop and count from the beginning. This guide walks through the method I use in my armchair every evening, with the same box of HiMo markers I keep in the side table drawer. A handful of them sit in a small ceramic bowl on top of the drawer, next to my reading glasses, so I can reach one without looking away from the work.
The habit that ends frogging rows for good
A hundred locking stitch markers cost less than one ruined evening of crochet. I keep a bowl of them next to my chair and reach for one every time I start a new row.
Amazon Check Today's Price on Amazon →Step 1: Mark your foundation chain before you stitch into it
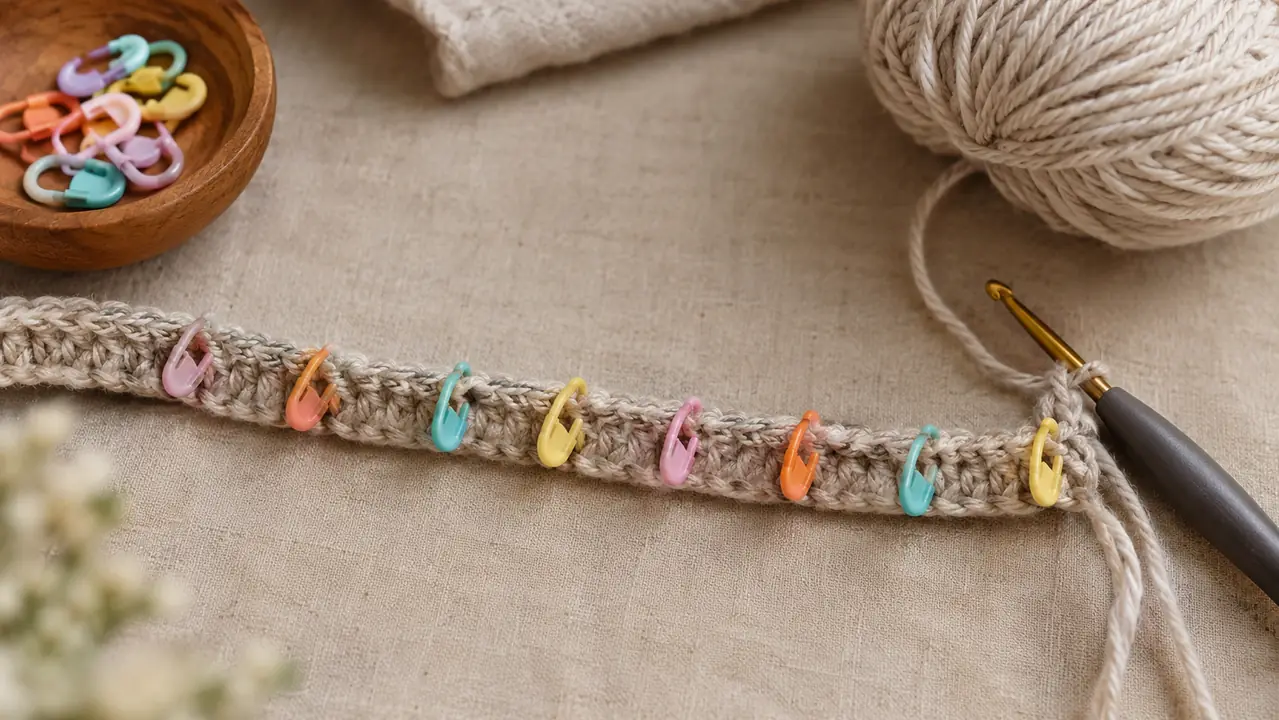
The foundation chain is where stitch count goes wrong first. You chain forty, then you work into the back bump of each chain, and by the time you finish the first row you have thirty-nine stitches and a gentle frown. The fix is to count the chain once, slowly, and clip a HiMo marker into every tenth chain before you pick up your hook. Last September I started a throw blanket with a foundation chain of 156 stitches. I counted it once, worked the first row, and came up one short. I pulled it out, chained again, and came up one over. The third time I clipped a marker into every tenth chain before I picked up my hook, and the first row came out at exactly 156. That was the evening I stopped trusting my memory with anything longer than ten.
Ten, twenty, thirty, forty. The markers turn a long chain into short, countable sections. If you need to check your count, you count to the first marker, then to the second, then to the third. You never count forty individual chains again. I have tried counting in my head, counting out loud, and writing tally marks on a scrap of paper. All of them failed the moment the phone rang or one of the cats landed on the yarn. The markers do not forget when I do.
Leave the markers in the chain as you work the first row. When you reach a marker, you know you have completed that section. Then remove it and clip it onto the row you just finished, at the same ten-stitch intervals, so the next row has the same landmarks. This sounds like extra work, but it is maybe four seconds per marker, and it saves the ten-minute job of counting a full row from the beginning.
Step 2: Clip a marker at the start of every row you need to track
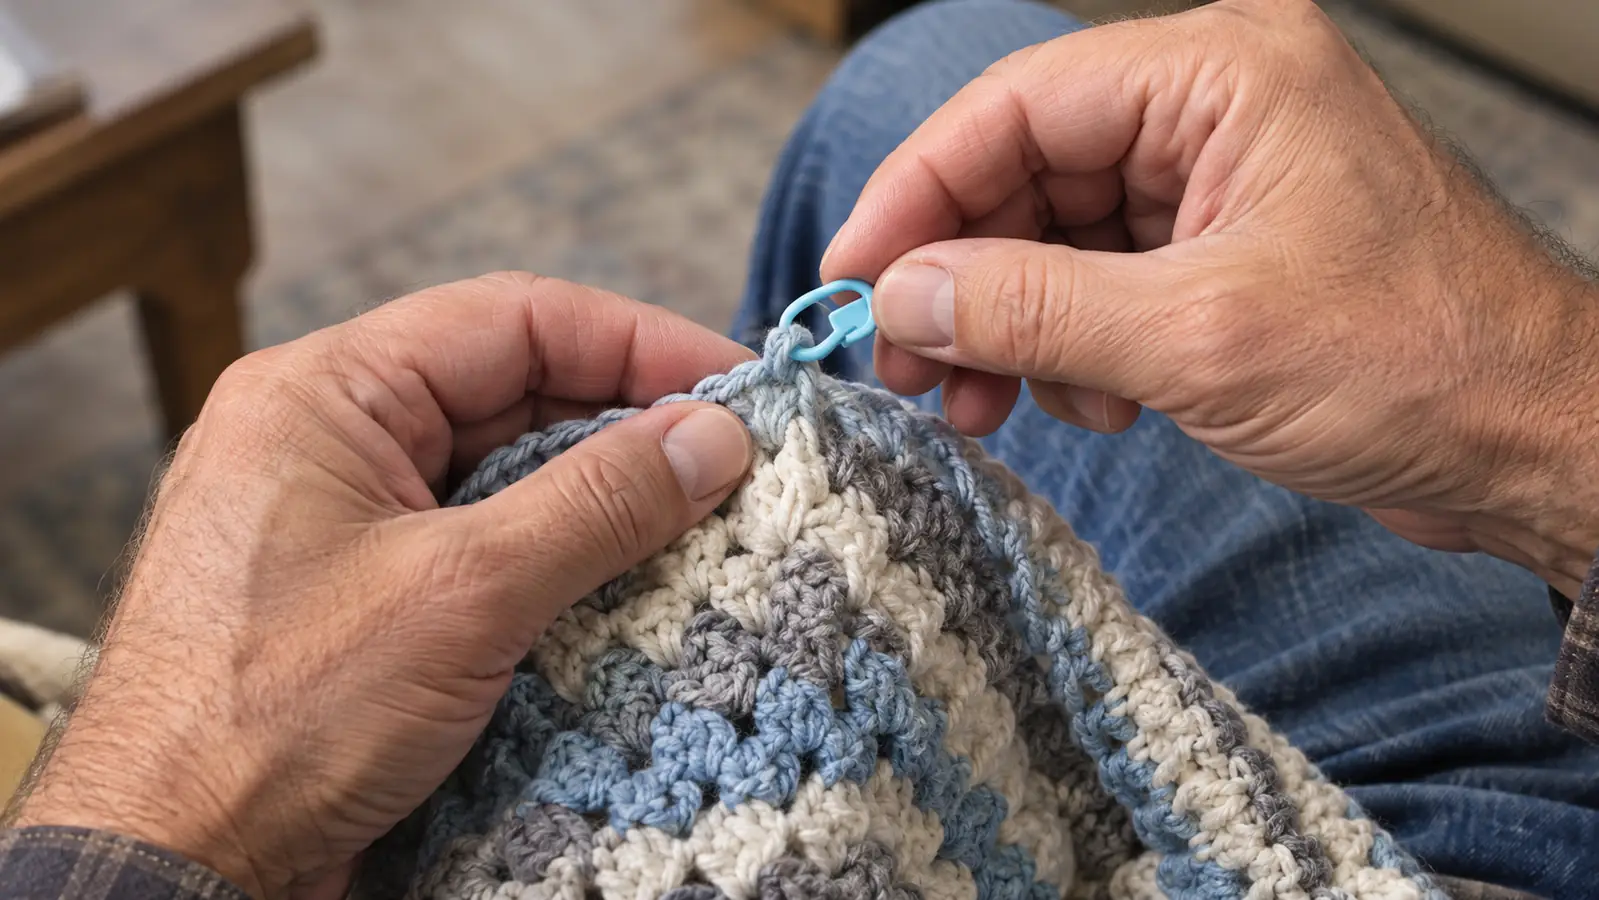
Some rows are easy to read and some are not. Rows that change direction, rows with increases or decreases, and rows worked into the front loop only are the ones that trick me. For those rows, I clip a HiMo marker into the first stitch before I begin, and a second one into the turning chain if the pattern uses one. I learned this the hard way on a shell-stitch baby blanket last winter. Three evenings in a row I finished a row, set the work down, and came back to find I could not tell where the row had started. The fourth evening I clipped a marker into the first stitch before I put the blanket down, and the problem disappeared.
The marker does not need to stay for the whole row. It needs to be there when you come back to start the next row, so you know exactly where the row began. If you have ever worked a shell pattern and lost the first shell, you know what I mean. The marker is the answer to a question you did not know you would ask until row six.
Use one color for the start of the row and a different color for the halfway point. The HiMo box has a mix of colors for exactly this reason. I use the bright ones at row starts because they are the ones my eyes find first in low evening light, and I keep the same color for row starts all the way through one project so my eyes learn to look for it.
Step 3: Mark every tenth stitch on long rows
For a blanket row of two hundred stitches, counting to two hundred every time is a chore. Marking every tenth stitch turns it into a series of small counts. Ten, twenty, thirty, and you are done. The markers act like mile markers on a road. The afghan I am working on now has rows of 214 stitches. Before I marked them, a single row took me three or four minutes of counting, and I still caught myself at stitch 180 wondering whether I had counted 160 twice. With markers at every tenth stitch, I check my place in about ten seconds.
Here is the part that took me years to learn: the marker goes into the top of the stitch, not between stitches. Clip it around the V of the stitch you just made. That way it sits where your hook travels next, and you cannot miss it. I spent a whole dishcloth with markers clipped between stitches, and every time I reached one I had to stop and figure out which side of it the next stitch belonged on. Clipping into the V of the stitch itself answers that before you ask.
When you reach a marker, count that stitch as part of the section you just finished, then move the marker forward ten stitches. The marker travels with you. It never stays in the same place for two rows, unless you are marking a repeating pattern that needs a fixed landmark.
Step 4: Use markers to hold pattern repeats, not just row counts
Stitch markers are not only for counting. They are for marking where a pattern repeat begins and ends. If a blanket pattern repeats every twelve stitches, clip a HiMo marker into the first stitch of each repeat. When you finish a repeat, the next marker tells you where to start the next one. I used this on a blanket where the repeat was eight stitches, and it turned a pattern I had to watch into one I could carry a conversation through.
This is the method I use for the afghans I make as gifts. I can watch television, talk to my husband, and still know exactly where I am in the pattern, because the markers do the remembering for me. My hands keep the rhythm and the markers keep the place.
For amigurumi, markers earn their keep in a different way. Rounds are short and increases come fast. I clip a marker into the first stitch of each round so I know where the round started. Without it, I have to count the whole round every time, and counting a spiral of single crochets is how I end up with a lopsided bear. The bear I made in the spring came out with one ear lower than the other because I lost the round start three times. The next bear had a marker in the first stitch of every round, and both ears sat where they were supposed to.
Step 5: Count twice at the end of each row, then move your markers
The marker method keeps you honest, but it does not replace the final count. At the end of each row, I count the stitches once, out loud, in tens. Then I count again, this time letting my finger touch each stitch. Two counts that agree mean the row is right. Then I move the markers to the new row and keep going. On a good evening this takes under a minute. On the evenings when the cats are chasing loose yarn, it takes longer, which is exactly why I do it.
If the two counts disagree, I do not panic. I count a third time, slowly. Usually the third count matches one of the first two, and the mistake is a single missed increase or a stitch worked into the wrong loop. Fixing one stitch is far easier than pulling a whole row. Last March I finished a row, counted 186, counted again and got 187. The third pass found the problem: I had missed an increase two repeats back. I pulled one stitch, worked it again, and the row was right. That is the whole argument for counting twice.
This is also the moment to check the markers themselves. A locking marker should sit snugly but not squeeze the yarn. The HiMo markers snap closed with a small click and stay put even when the blanket is draped over my knees. If a marker feels loose, I swap it for another from the box rather than trusting it. Out of the hundred in the box, a handful close a little less firmly than the rest. I tested them on a scrap swatch the first week and set the loose ones aside, so the ones in my bowl are the ones I trust.
What Else Helps
A few things work alongside markers to keep counts honest. A row counter that clicks on your finger or your hook saves you from remembering which row you are on. A small notebook and pencil on the side table lets you jot down the row number and the stitch count when you stop for the night. And a good light over your left shoulder, if you are right-handed, means you can actually see the V of each stitch before you clip a marker into it. I tried a row counter that sat on my finger first, and it clicked every time I moved my hand, which drove me crazy by the end of one evening. The one I use now hangs on the hook and only clicks when I want it to.
I also keep my HiMo markers in a bowl, not a bag. When they sit loose in a bag, they tangle with the yarn and the cats think they are toys. In a bowl on the side table, they are exactly where my hand expects them to be. Romeo and Juliette still occasionally bat one onto the floor, but the bowl keeps the chaos contained. I tried a zippered pouch first, but the markers slid to the bottom and I fished for them with one hand while holding the hook in the other. The bowl fixes that. I can reach in without looking.
One more thing: if your hands start to ache from redoing rows, that is a sign to change how you work, not just what you count. I have mild arthritis in my right thumb, so I keep my hooks ergonomic and I stop for a few minutes every hour. Stitch markers will not fix hand pain. A doctor or hand therapist is the right person for that. What markers fix is the frustration of losing your place. I tried safety pins before I found locking markers, because that is what my grandmother used, and the pins snagged the yarn and poked me. The locking markers close over the stitch and stay out of the way.
The markers turn a two-hundred-stitch row into a series of small counts, and small counts are the only ones my evening brain can be trusted to make.
Start tonight with a bowl of markers by your chair
You do not need a new hook or a new pattern. You need a hundred small plastic clips that cost less than a skein of good yarn. Put them where you crochet, and use them every row.
Amazon Check Today's Price on Amazon →